Why do air intake hoses crack when they seem flexible and intact? Heat, ozone, oil mist, vibration, and repeated engine movement gradually weaken their rubber walls. A small split near a clamp can admit unmetered air, disturb fuel trim, trigger a check-engine light, and create an uneven idle.
Gates’ automotive hose-service guidance identifies heat, chemical exposure, abrasion, and incorrect installation as common causes of premature hose failure. The U.S. Environmental Protection Agency’s emissions-modeling work also treats intake-air and fuel-control conditions as important variables in vehicle performance. These sources support a practical point: a hose is not merely a tube. It is part of the engine’s air-measurement system.
Automotive technician Eric Cook, known as EricTheCarGuy, repeatedly stresses this diagnostic principle: “Test the system before replacing the part.” That advice matters here. A cracked hose may be the real fault, but a loose clamp, damaged breather line, or failed sensor can produce similar symptoms.
Look closely. Feel the underside. Bend the hose gently near each rib and connection. Soft spots, shiny oil-soaked rubber, white stress marks, or a faint hiss deserve attention. Do not rely only on mileage. There is no universal replacement interval for every vehicle.
Replacement is usually straightforward, yet mistakes happen. The wrong hose diameter can collapse under suction. An over-tightened clamp can cut the rubber. I may sound cautious, but that is deliberate: clean routing, correct fit, and a smoke test often matter more than speed. This guide explains why air intake hoses fail and how to replace them without overlooking the smaller clues.
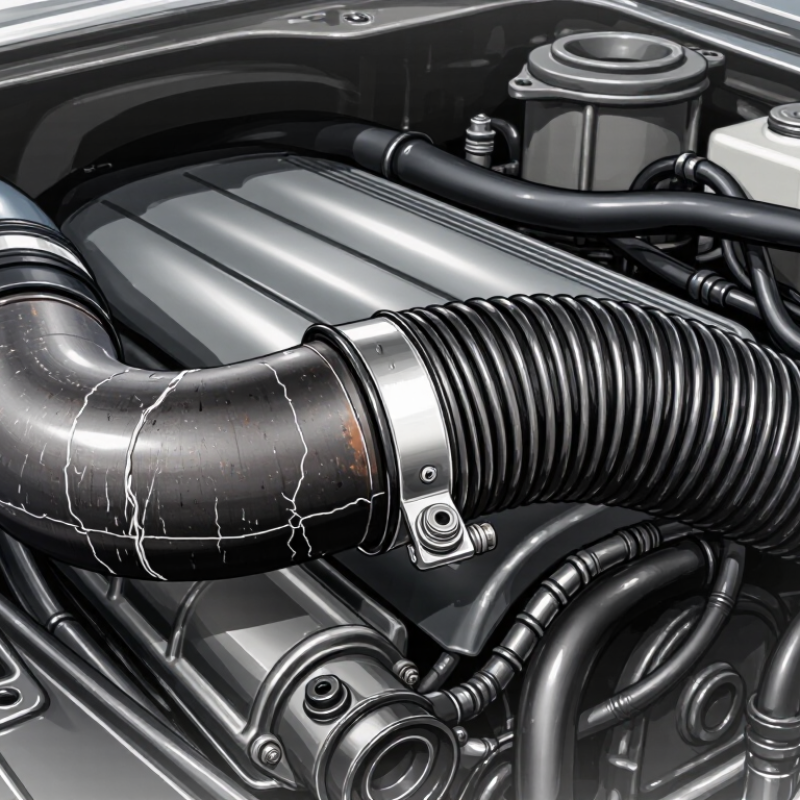
An air intake hose is a flexible tube that carries filtered air from the air filter housing to the engine’s throttle body. It is part of the engine’s breathing system. The hose must stay sealed while the engine draws in large amounts of air.
Most intake hoses use rubber or reinforced plastic. They also absorb vibration between fixed engine parts. Some designs include ports for vacuum lines or a mass airflow sensor. A small crack can disturb the measured airflow. Air may enter after the sensor, creating an incorrect air-fuel mixture.
I have found cracks hiding beneath hose folds and near clamp edges. The symptoms can include rough idling, hesitation, poor acceleration, or a faint hissing sound. A warning light may also appear. However, these signs can come from other faults, so replacing the hose without inspection is not always wise.
To replace it, let the engine cool completely. Loosen the clamps and disconnect attached hoses carefully. Compare the replacement hose with the old one before installation. Fit each end fully, then tighten the clamps firmly without crushing the material. Check that the hose does not rub against belts, wiring, or hot exhaust parts. Start the engine and listen for leaks. I once focused only on the visible split and missed a loose clamp nearby. That mistake was simple, but it caused the same symptoms again.
Air intake hoses crack because they face heat, vibration, oil mist, and constant pressure changes. The rubber or plastic gradually loses flexibility. Tiny surface lines often appear near clamps, bends, and engine connections. I have seen a hose look acceptable from above while splitting underneath. That hidden damage can be easy to miss.
A cracked hose allows unmetered air to enter the engine. This imbalance may cause rough idling, hesitation, poor acceleration, or difficult starting. Some vehicles may also show a warning light. In severe cases, the engine can stall during traffic. A loose hose can create similar symptoms, so replacing parts without checking the fittings may waste time. I learned that lesson after replacing a serviceable hose.
Tips: Inspect the hose when the engine is cool. Flex it gently and look for brittle areas, oily residue, or loose clamps. Do not stretch damaged rubber. Match the replacement hose to the original diameter and routing. A hose that bends sharply can crack again. Tighten clamps firmly, but avoid crushing the connection. After installation, listen for hissing and check idle quality. If symptoms remain, inspect nearby sensors and connections. A careful visual check helps, but it cannot replace proper diagnostic testing.
| Failure Cause | What Happens to the Hose | Common Signs | Possible Engine Problems | Recommended Action |
|---|---|---|---|---|
| Heat aging | Repeated exposure to under-hood heat dries the material and reduces its flexibility. | Hard, brittle surface; cracks near hot components; splitting when flexed. | Unmetered air, rough idle, hesitation, and reduced drivability. | Replace the hose and check that it is routed away from excessive heat. |
| Oil and chemical exposure | Oil vapor, fuel residue, and cleaning chemicals can soften or swell some hose materials. | Oily film, swelling, soft spots, sticky surface, or delamination. | Air leaks, unstable airflow readings, and possible warning-light activation. | Replace the damaged hose and investigate the source of excessive oil contamination. |
| Vibration and engine movement | Movement repeatedly bends the hose and concentrates stress at joints and ribs. | Cracks at bends, clamp locations, corrugations, or connection points. | Intermittent hesitation, fluctuating idle, or air noise during acceleration. | Install the correct hose and verify that brackets, supports, and clamps are secure. |
| Ozone and environmental aging | Long-term exposure to air, sunlight, and ozone can create surface checking and dry rot. | Fine network of small cracks, especially on the outer surface. | Small vacuum or intake leaks that may worsen over time. | Replace the hose if cracks extend through the wall or appear around a seal. |
| Incorrect installation or over-tightening | Misalignment, excessive clamp pressure, or sharp bends can damage the hose. | Pinched section, distorted end, clamp indentation, or a loose connection. | Air leakage, poor throttle response, and abnormal intake noise. | Align the hose naturally and tighten clamps securely without deforming the connector. |
| Physical contact or abrasion | Rubbing against brackets, wiring, or nearby components gradually wears through the wall. | Scuffed surface, worn-through area, or a hole on the contact side. | Unmetered air and an increased risk of dirt entering the intake system. | Replace the hose and correct the clearance or add suitable protection. |
| Age and repeated flexing | Normal expansion, contraction, and engine operation gradually fatigue the material. | Multiple cracks, loss of elasticity, or a hose that no longer holds its shape. | Progressive air leakage and inconsistent engine performance. | Replace the hose rather than relying on tape or sealant as a permanent repair. |
| Step | Procedure | Important Check |
|---|---|---|
| 1. Confirm the fault | Inspect the entire hose with the engine off and flex it gently to reveal hidden cracks. | Check both ends, molded ribs, branch ports, and clamp areas. |
| 2. Select the replacement | Use a hose with the correct inside diameter, length, bends, ports, and temperature resistance. | Do not use a substitute that collapses, stretches, or contacts hot components. |
| 3. Remove the old hose | Allow the engine to cool, loosen the clamps, disconnect attached hoses or sensors, and remove the damaged part. | Avoid pulling on wiring, sensor connectors, or plastic intake fittings. |
| 4. Install the new hose | Seat the hose fully on each connection and position clamps behind the sealing beads where applicable. | Ensure the hose is not twisted, pinched, or sharply bent. |
| 5. Test the repair | Start the engine and listen for hissing; inspect for movement, leaks, or contact with nearby parts. | Clear any stored fault codes only after the leak has been corrected and verify normal operation. |
A cracked air intake hose can hide beneath a clean engine cover. Begin with a visual inspection while the engine is cold. Look for splits near clamps, flattened sections, oily stains, and loose couplings. Flex the rubber gently. Small cracks often open like dry riverbeds.
Then listen carefully. A hissing sound during idle may indicate unmetered air entering the intake system. An unstable idle, delayed acceleration, or an illuminated engine warning light can support that suspicion.
However, these symptoms also come from sensors, gaskets, or fuel problems. Guessing can become expensive.
The U.S. Environmental Protection Agency explains that unmetered air can disturb the engine’s air-fuel balance and increase emissions. A 2017 AAA survey reported that 64 million drivers could not afford an unexpected repair bill. That makes a careful diagnosis worthwhile. I once found a hose that looked intact but opened under hand pressure. I nearly missed it.
Use a flashlight and inspect the underside. Check whether clamps sit behind the molded sealing ridge. A basic smoke test can reveal leaks more reliably than sound alone. Replace the hose if it is brittle, torn, oil-softened, or unable to seal. Match the original shape and inner diameter. Do not stretch a shorter hose into position. After installation, clear the warning code only after checking for renewed leaks.
Air intake hoses can crack from heat, oil mist, vibration, or age. I have found small splits near clamps most often. Before replacement, let the engine cool completely. Gather a screwdriver, pliers, gloves, and the correct replacement hose. Photograph the hose routing before removal. This small step prevents confusion later.
Loosen both clamps without forcing them. Disconnect any breather tube or sensor connector attached to the hose. Remove the old hose carefully, then compare it with the new one. Check the openings, bends, and connector ports. Push the replacement hose fully onto each fitting. Align it with the original route. Tighten the clamps firmly, but do not crush the rubber. Reconnect every tube and electrical plug. Start the engine and listen for hissing. A rough idle may indicate an unfinished connection.
Tips: Inspect nearby wiring while the hose is removed. Worn wiring can cause separate problems. Do not use tape as a permanent repair. It may hide the crack temporarily, but unmetered air can still enter. After my first replacement, I tightened one clamp too much and damaged the hose edge. I now tighten gradually and inspect the seal by hand. A short road test can reveal poor acceleration or an unstable idle. Recheck the clamps afterward, because new rubber may settle slightly.
Typical DIY time estimates for each step of an air intake hose replacement
Air intake hoses commonly crack because of repeated heat cycles, oil vapor exposure, ozone, vibration, and age-related loss of flexibility. Let the engine cool completely, inspect the hose for splits or soft spots, loosen the clamps, remove the damaged hose, install the replacement securely, and check for air leaks before driving.
Air intake hoses crack because rubber ages under heat, ozone, vibration, and oil vapour. S&P Global Mobility reported that the average U.S. vehicle age reached about 12.6 years in 2024. Many hoses now operate far beyond their original service conditions. That matters.
Prevention starts with inspection, not replacement. Check the hose during every oil service, especially near clamps, bends, and hot exhaust components. Look for faded rubber, surface lines, soft spots, or oily swelling. A small split can cause unmetered air, rough idling, poor acceleration, and higher fuel use. SAE technical literature identifies heat, chemical exposure, and repeated flexing as major elastomer aging factors. Keep the hose away from sharp brackets, loose wiring, and direct engine heat. A missing heat shield can quietly shorten its life.
Use the correct hose material and avoid over-tightening clamps. Excessive clamp force can cut the rubber, while a loose clamp allows movement and leaks. ASTM D573 accelerated-aging testing commonly evaluates rubber at 70°C for 168 hours, showing why temperature resistance must be considered during part selection.
I once treated a faint intake whistle as harmless; the hose later split beside the clamp. That was a preventable mistake.
During replacement, clean the mating surfaces, seat both ends fully, and inspect the air filter housing for distortion. Recheck the connection after a short drive.
Conditions vary, and a fixed replacement schedule may be less reliable than frequent, careful inspection.